
Hello all, Sonia from the warehouse here.
Coloring eggs with the family is a fond childhood memory of mine. When Easter was on its way I knew that soon I would be spending the Friday before at my Grandmother’s house, enjoying her home-made deviled eggs and dyeing hard boiled ones to hide and then find after church was out on Sunday.
I won’t be congregating this coming Easter Sunday - most services are still on hold due to Covid-19 concerns, and these days my springtime celebrations begin earlier anyway, on the equinox.
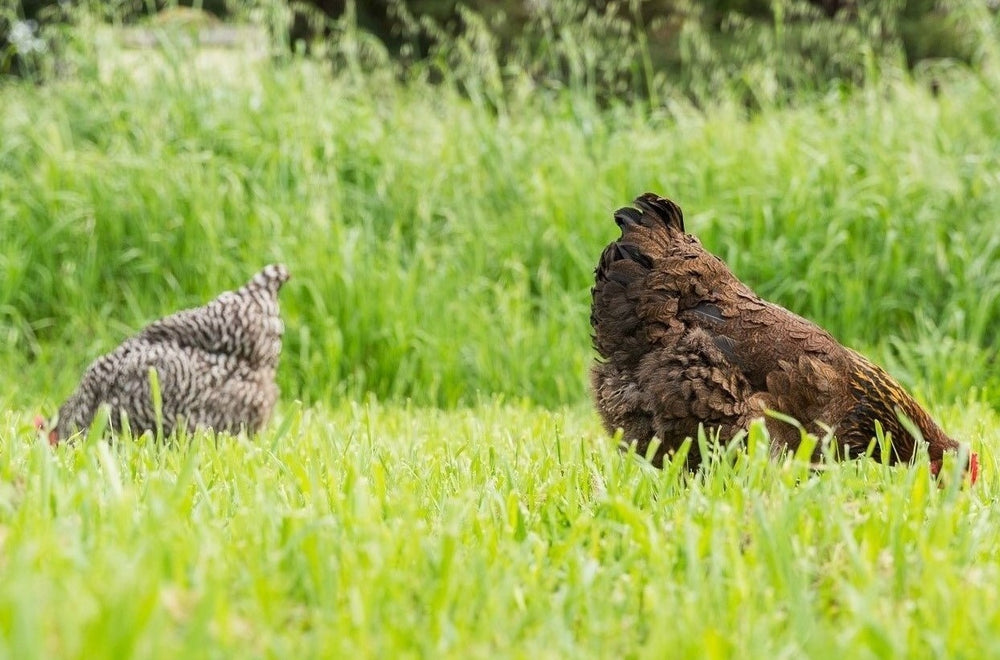
This past spring equinox I decided to try something new and dye eggs naturally using only edible ingredients. It has been years since I – or my mother, whose chickens supplied the eggs and whose kitchen I turned into an experimental laboratory – had dyed eggs.
We didn’t even have any of those old wire spoons that come with the kits you get at the grocery store anymore. In the end we didn't need them, however. Any slotted spoon, like the type for serving peas or pasta, works just fine.
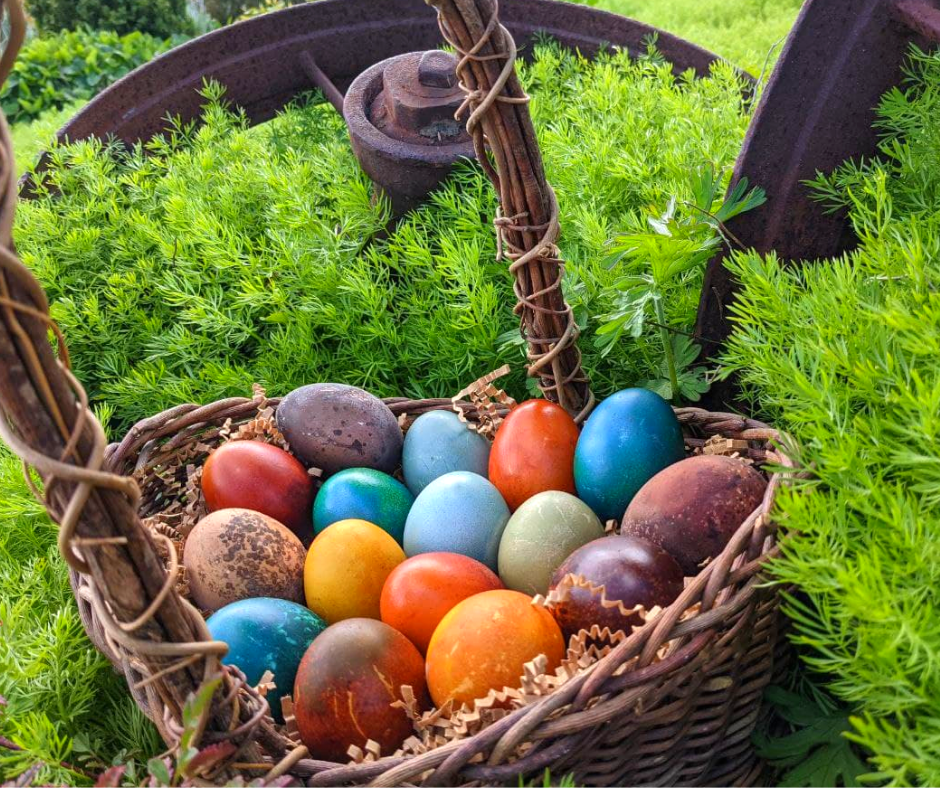
I’ll cut to the chase – the results were amazing. The eggs tuned out better than either of us expected, and so of course, I had to share!

Vibrant, variant colors! Oh, happy spring! And all achieved with a few simple kitchen ingredients: eggs dyed with water and vinegar, purple cabbage, the skins of red and yellow onions, turmeric powder, and some cheap red wine.
The process of dyeing is essentially the same for each color, the one exception being the mottled brown eggs.
Making the Dye
To create the same dyes that I made you will need the following:
- The skins of 6 red onions
- The skins of 6 yellow onions
- Half a head of purple cabbage
- Two tablespoons of turmeric powder
- Water
- White vinegar
I made two cups of dye per color from this.
A note about onion skins: Sometimes its difficult to tell where an onion’s “skin” ends and the actual onion begins. I just peeled until my onions were shiny, and that worked out for me.
Red (burnt orange, really): You will need about a cup of skins per egg and you want them packed in. I found that the mesh bundle of red onions provided the right amount for the two eggs I wanted to dye.
Place the onion skins in a pot on the stove. I used two cups worth of onion skins and then put two cups of water in over the top. I left it uncovered and brought it up to a boil, then down to a simmer and left it there until the water had become super dark. I then strained the onion skins away and let the water cool in the refrigerator.
Once the container it was in was cool to the touch (it doesn’t have to be cold, lukewarm is fine) I added in 1 tablespoon of white vinegar per cup of fluid. Voila, natural dye!
Orange: The same process as Red, but with yellow onion skins.
Yellow: Turmeric powder was used to make these bright yellow eggs. Turmeric does a good job of staining anything it touches, and eggshells are no exception. I put two tablespoons of turmeric powder into two cups of water and brought it to a boil. I became impatient waiting for it to fully cook down, so when I took it off to cool there was still turmeric sludge at the bottom.
This sludge creates a deeper shade of yellow, more like goldenrod or bright orange. Since I had one egg sitting on top of the other, the egg on top turned out more of a bright yellow and the egg on bottom that was sitting half in the sludge turned out blotched with deep goldenrod.
I like this artistic touch, but if you want more uniformity in your coloring you can wait until the turmeric is fully cooked down and no more sludge remains.
The next part is the same as before. Wait for the water to cool, add 1 tablespoon of white vinegar per cup of water, and your dye is ready.
For Blue: Purple cabbage is the secret to the stunning blue hues on naturally dyed eggs. I used half a head of purple cabbage, chopped. (It doesn’t have to be coleslaw thin; the chopping is mostly to make it fit in the pot better) I then covered it with the two cups of water, brought it to a boil and then down to a simmer.
Simmer it for however long it takes for your water to look deep purple, almost black. Strain the cabbage, let the purple water cool down, and add one tablespoon of white vinegar per cup of water.
And there are your dyes!

Dyeing the Eggs
To dye the eggs all you need is patience and space in your refrigerator.
There are two ways you can go about the dyeing process: You can Set & Forget, or you can Dip & Dry.
The Set & Forget process is what I did. Each egg went into a cup of dye in the refrigerator, and it sat there overnight. The result was mottled, deep hues that were quirky, with a light ring on each egg wherever it was touching the glass. This doesn’t bother me, as they usually sit on the “ring” end anyway and hide it. If you want more uniformity, there is another dye process you can try.
Dip & Dry goes as follows: Place your eggs in their dye in the fridge, but every four hours take them out with as little handling as possible using a slotted spoon. Set them somewhere, like an egg carton, to dry off. Then, place them back in the dye for another four hours. The more times out, dried, and then back in they go, the more uniform the overall coloring will be.
For lighter colors simply pull your eggs from their dyebath sooner rather than later. Less time gives you lighter hues. For greens, place turmeric dyed eggs in a cabbage dye bath.

To shine or not to shine: Synthetic dyes often give eggs a glossy look. This can be achieved on natural dyed eggs by giving them a gentle polish with either olive oil or canola oil after they have dried off.

In the end I opted to polish them and went for a glossy look. It helps them catch sunlight well, which may be important if you plan on hiding them in a grassy field for little ones to find. And with that, there you have it - stunningly colored, naturally dyed hard-boiled eggs.
Now you may be wondering... what about those mottled brown ones? Grab your corkscrews – here’s where the wine comes in.

Each egg here went through the same process all at once and sat in the same dyebath for the same amount of time. The wildly different results are part of what makes this process so fun.

These eggs went into a pot raw and then were boiled in red wine instead of water. Use anything cheap – I had a horrible bottle of 2016 merlot I sacrificed for this purpose. Bacteria will turn opened wine into vinegar, so if you popped a bottle about a week ago and didn’t finish it this is a creative use for it before it goes down the drain.
Once the eggs are boiled, turn the heat off. Leave the eggs in the wine bath as it cools and eave them there overnight on the counter, not in the refrigerator. Check on them in the morning and see your results.
You can’t polish these ones as their color is sitting on top of the shell more than leeched into it. You will also notice that if you turn them in the light they are covered in tiny crystals.
What your eggs turn out to look like in the end probably has a lot of factors that I don’t understand, but they will absolutely look really cool. With their earthen tones, they make great culinary art pieces for any time of year.
And there you have it. Go forth and experiment! The results will be stunning no matter what.
BEFORE:


Blessed Ostara, Happy Spring Equinox, and Easter Blessings to you all.


-Sonia, Treats for Chickens 🧡


Let's keep your flock happy + healthy!
Got something to cluck about? Have other suggestions? Questions?
Help fellow chicken parents and leave a comment below!